How to re-render a historic brick and timber framed house with breathable lime renders
The first crucial step before any rendering work can commence is preparing a comprehensive repair schedule for the historic timber frame within the building's external skin. This repair schedule is of utmost importance as it guides the careful assessment, selection of appropriate materials, and skilled techniques required to preserve the structure and its historical significance while repairing damaged external historic timber framing in a timber-framed and brick building.
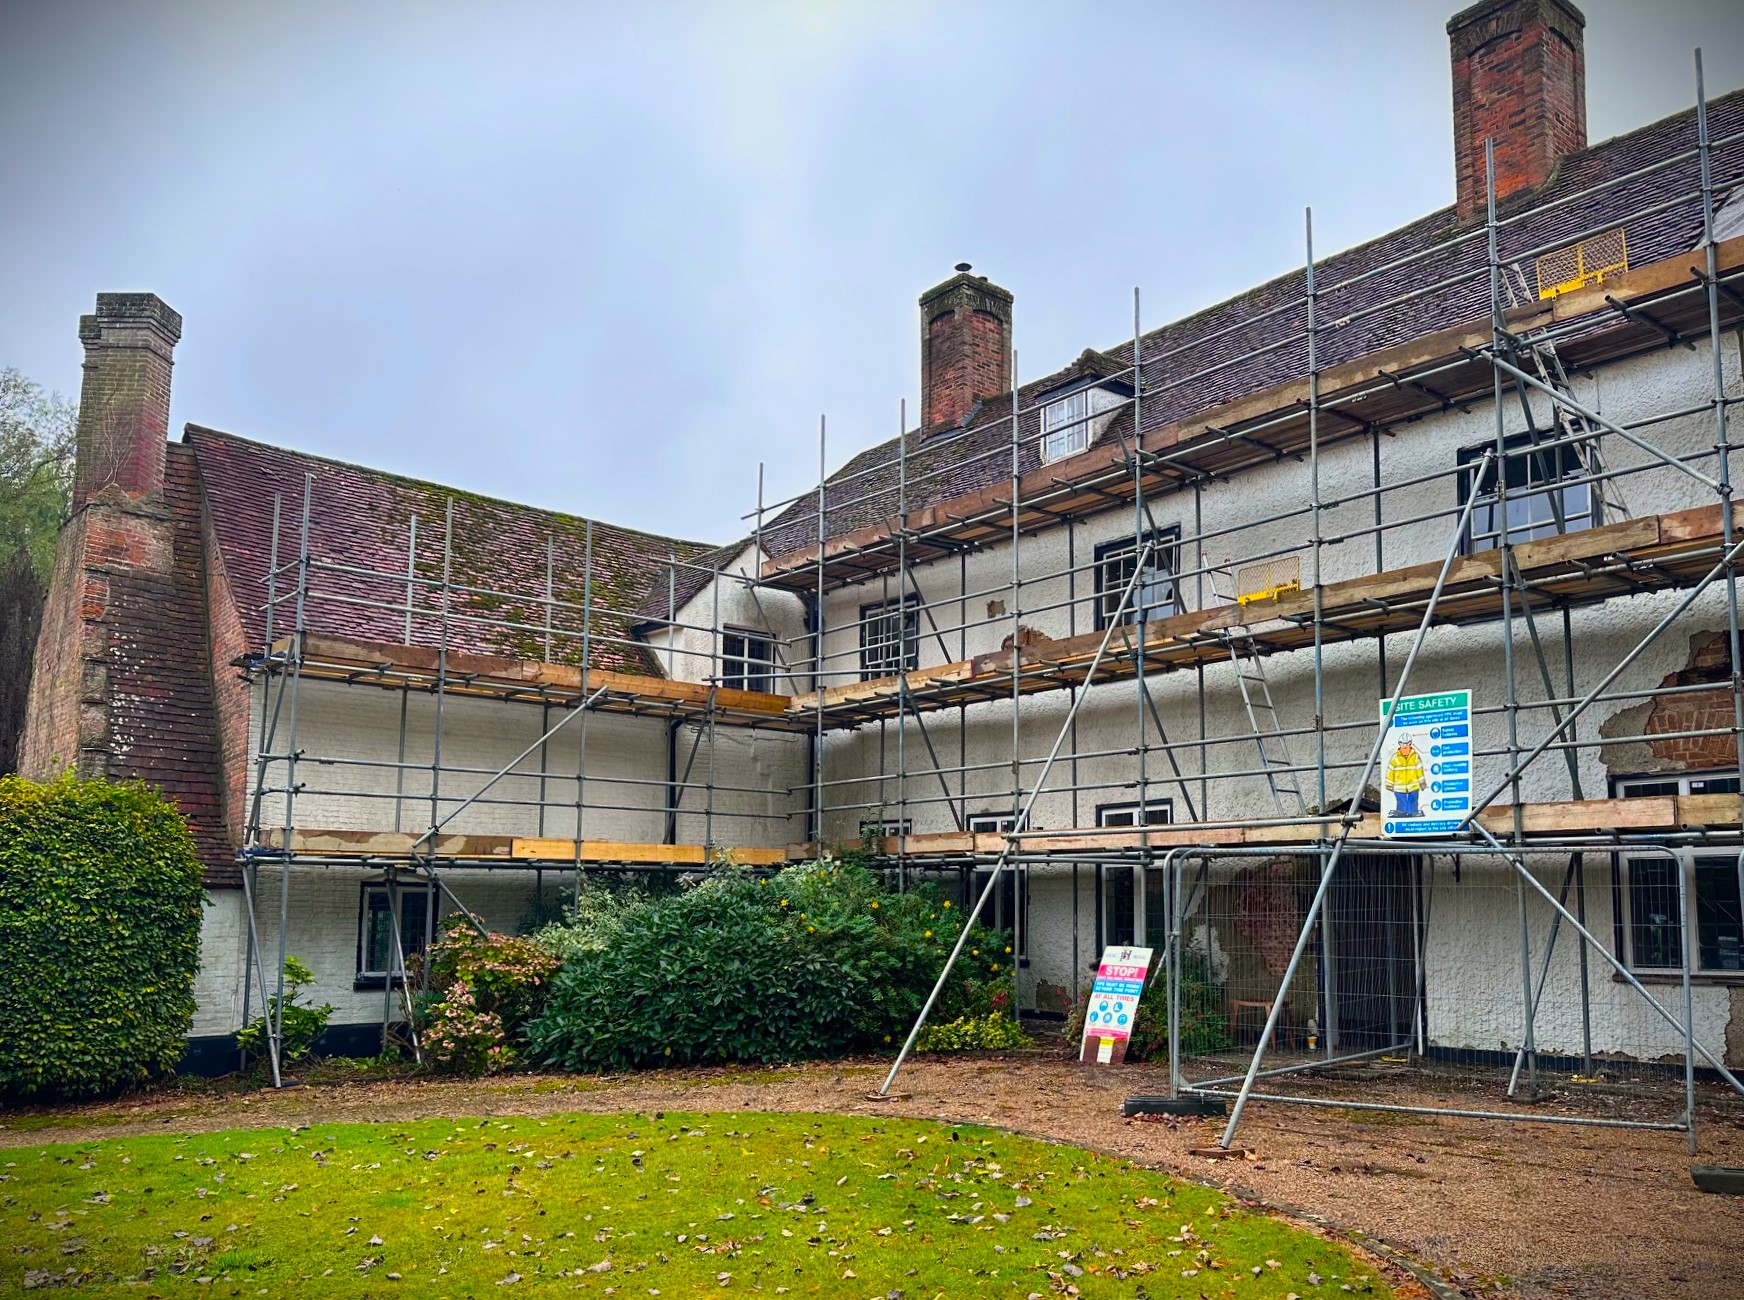
All the dense and damaging strong cement render with its plastic-bound external paints must be removed from the outside of the building. This must be done in stages to ensure that brick infill panels, previously held in by wood that is now rotten, don't collapse locally as the strong render is removed. Some bricks will need to be removed with the render to prevent this.
Once areas of timber frame are exposed, the principal posts need to be inspected by a carpenter with extensive experience repairing historic timber frames and an experienced and sympathetic structural engineer to determine how the posts should be repaired.
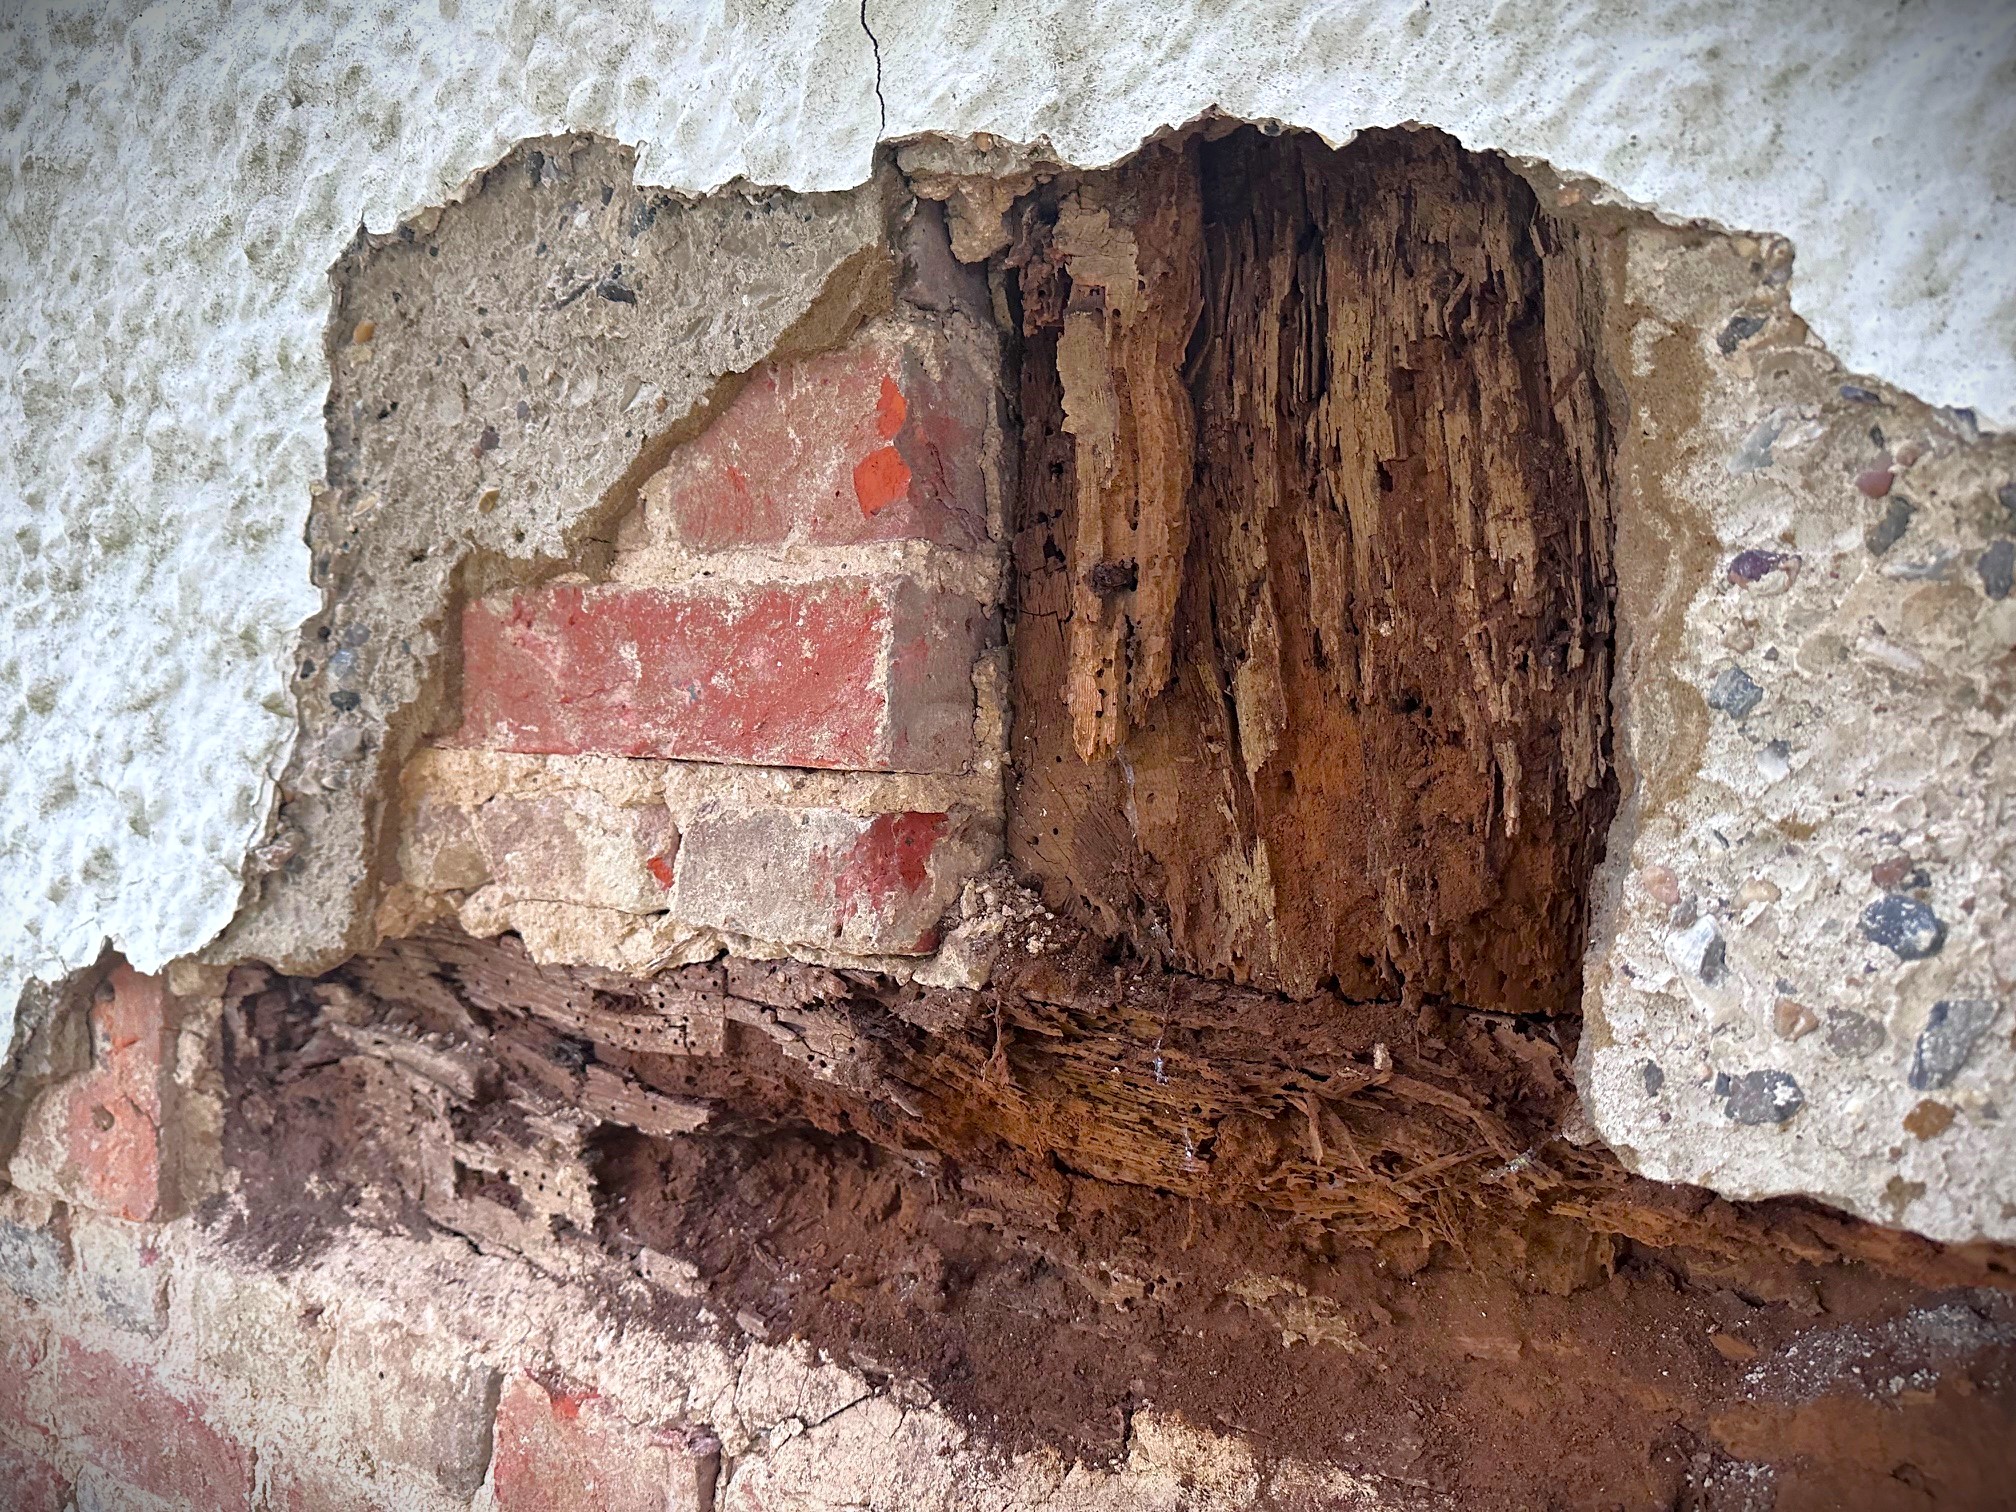
Clearly, you will then need to inspect all the timber frames for any signs of damage, such as rot, insect infestation, cracks, or missing sections. As you know, there can be extensive rot because wetness has been trapped in the timber for many years, and your plans to re-render the building in lime will help reduce the causes of this decay in the future.
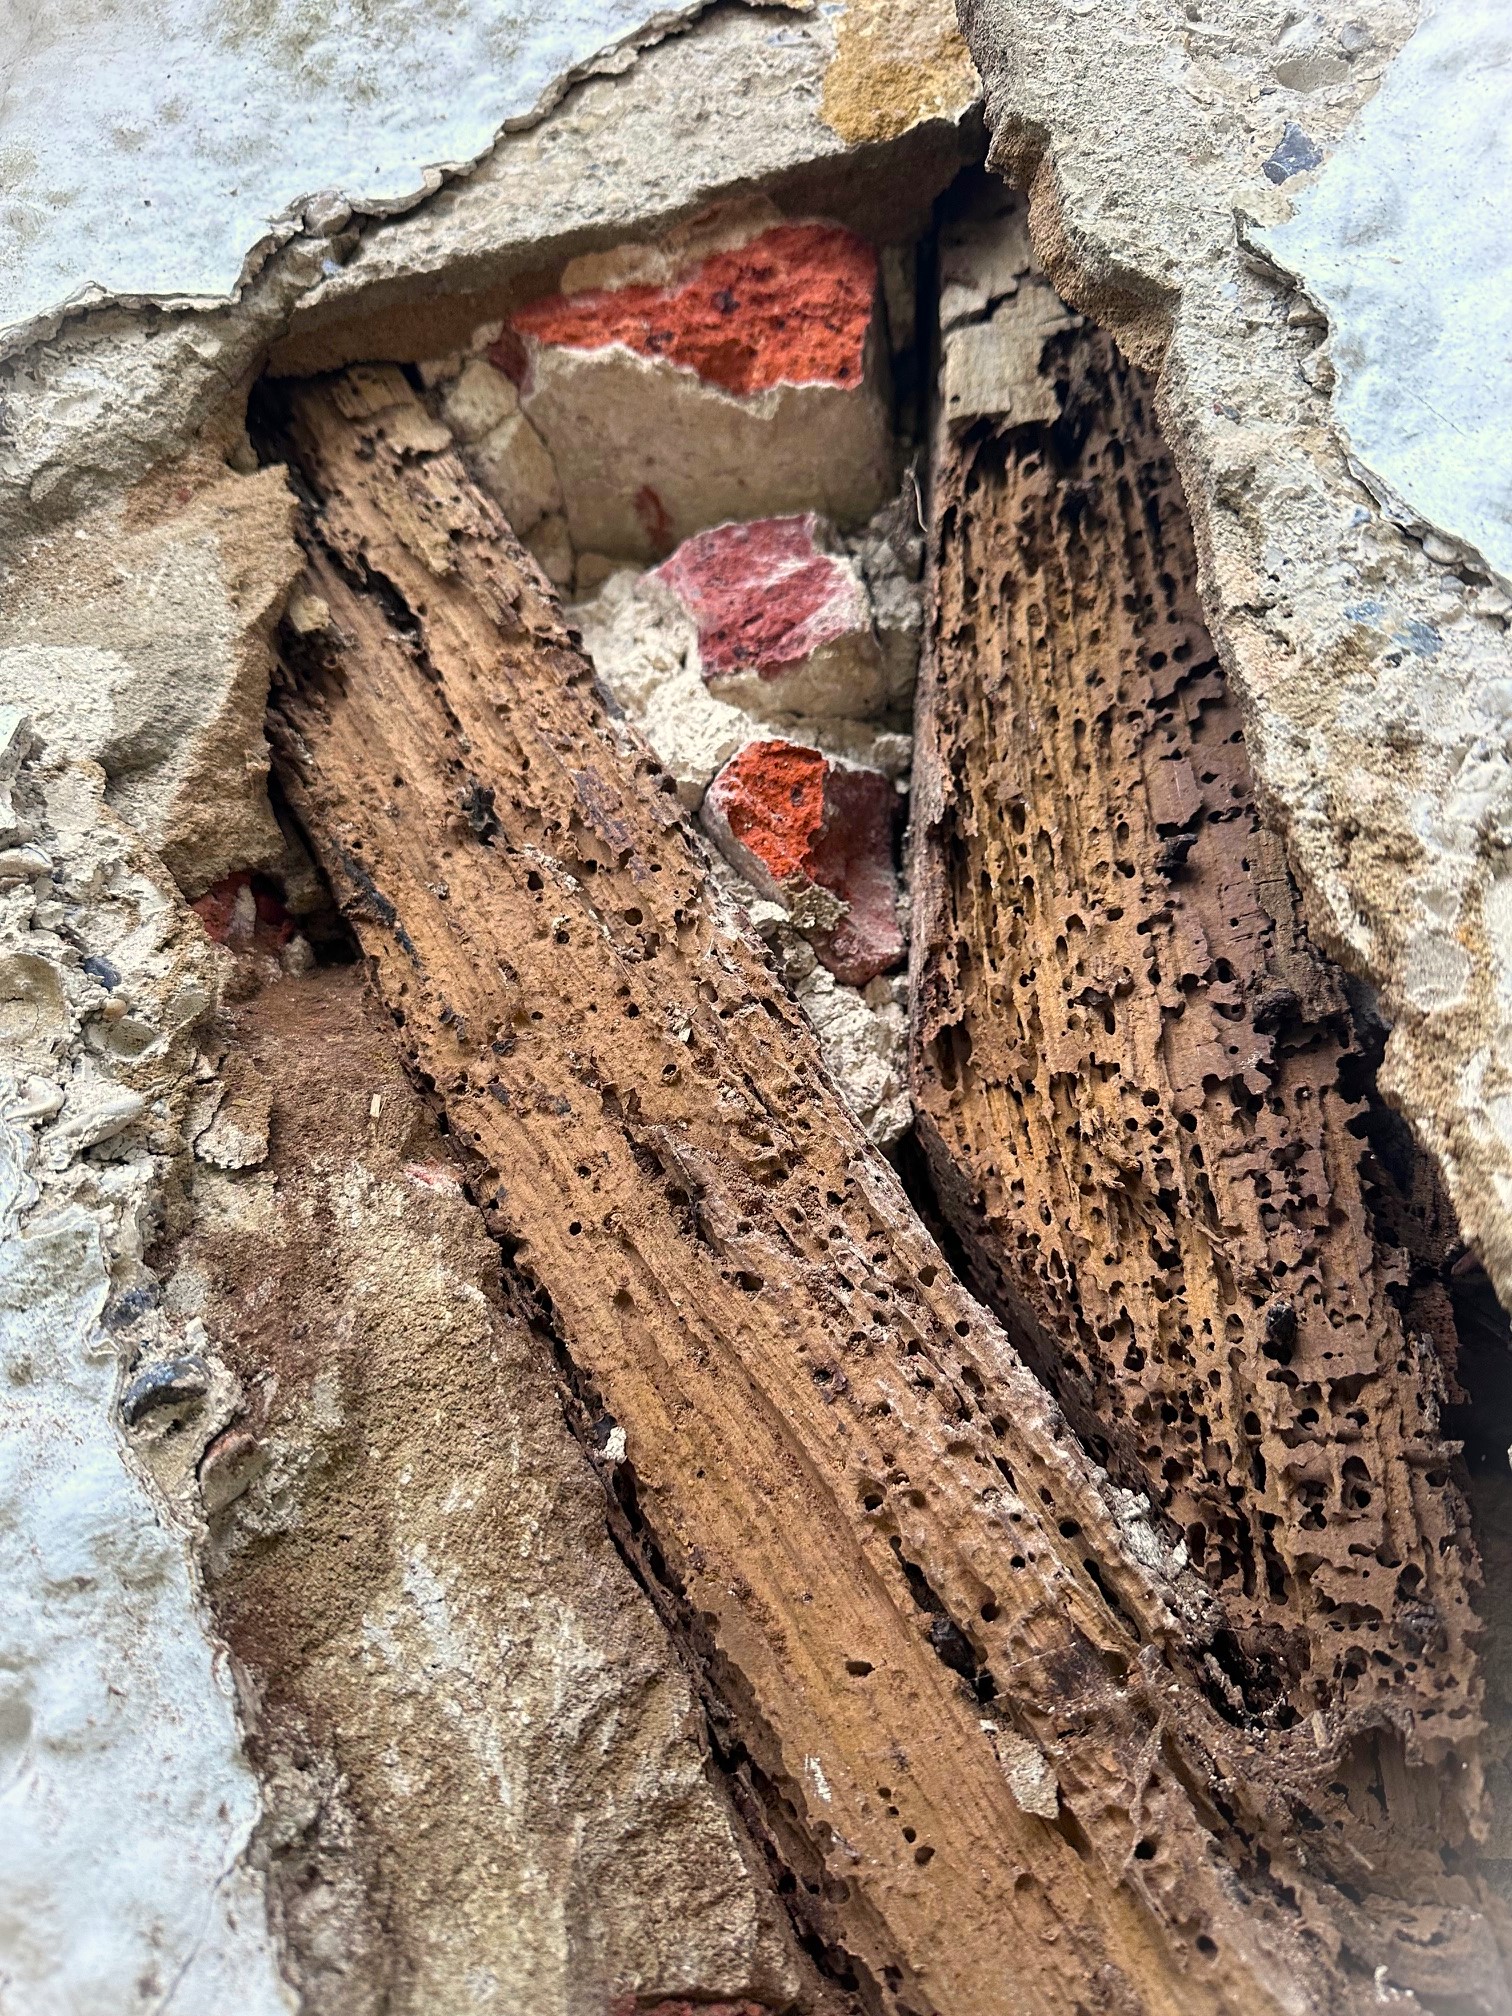
Once you have repaired the damage by patching or replacing severely damaged sections using wood that matches the original timber in terms of type, grain, and appearance, you can re-render the building.
You are considering lime renders due to their breathable qualities, flexibility, and compatibility with traditional materials. Rendering over a damaged historic timber frame with lime is a sympathetic process that requires careful preparation and application. M Womersleys have been asked for advice on which lime renders and build-ups should be used. I have outlined the options below for you to discuss with the local authority conservation officer and Historic England.
Option 1. Re-render using lime putty or feebly hydraulic lime-bound renders. (HOT LIME RENDERS MUST NOT BE USED)
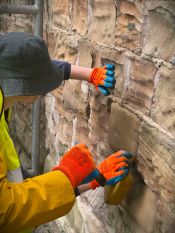
Lime putty or feebly hydraulic lime binders could be used to make renders to apply over the external skin of the repaired brick and timber frame. As noted above, any damaged or loose bricks will have been repaired as part of the required preparation works. Any significant gaps, cracks, or imperfections in the wall must also be filled and pinned using a compatible lime putty based mix. However, more recent and denser bricks inserted in the wall will not provide enough suction for ‘fat lime’ render, the surface of the bricks will need to be nicked, and the joints will need to be raked out to provide a sufficient key for the first coat of lime render. In addition, all the old cementitious residue will need to be removed from the bricks again to allow enough bond to be created by the new, weaker lime-based render.
The timber frame will require battens of lath applied vertically to the frame itself and 100 mm to either side and secured into brickwork with plugs and screws. Afterwards, the riven lath should be nailed onto the lath or battens, leaving 8-10 mm between the laths.
Gutters and downpipes need to be repaired and working efficiently, and any that have had to be removed to allow repairs to the building to take place need to have temporary ones put in place to ensure all water is taken away from the building during wet weather. The scaffolding will need to be fully wrapped, and if the work is done over the autumn and winter, this space will also need to be heated to allow the lime render coats to cure.
Once the preparation has occurred, the brickwork has been washed and wetted down, and excess water has dripped off. Apply a render comprised of one part lime putty (with a minimum density of 1250g/l) and two and a half parts sharp 3 mm down well-graded clean sand. Add a minimum of 1 kg of animal hair per 200 litres of mortar to the mix in all areas where the lathed timbers are to be rendered.
Because of the unevenness of the walls, it is likely to require one or two daubing-out coats and then a scratch coat, each applied at no more than 10-12 mm at a time. The coat will need rubbing back and keying and should be kept damp but not wet while it cures. It should be left for at least one week in good weather conditions to cure every daubing-out coat and undercoat.
Wet down the scratch coat and apply a float coat of the same lime with three parts of the same sand. Rub back, key, and cure properly. Leave at least two weeks to cure in good conditions.
Depending upon the finish required, apply a final harled or trowel-applied finish. Using lime putty and three parts aggregate. Leave all the render protected and warm for 12 weeks before applying three coats of lime wash.
Comments on option 1.
Once fully cured, the resulting render will provide good vapour permeability and flexibility compared with a cement/lime-based render. Still, it requires skilled application and careful long-term protection and curing.
Option 2. Re-render using a moderately hydraulic lime-bound render
All the same preparation works described above will be required before applying a moderately hydraulic lime render, but rather than pecking a key onto later inserted dense bricks, raking out all the joints and removing every bit of cement residue from the face of the brick (which is likely to cause substantial damage), it is possible to apply a stipple coat of one part NHL3.5 to two parts sharp sand. If applied unevenly between 2 and 4 mm and left to cure for five days, it will provide a suitable key for subsequent hydraulic lime-bound daubing out layers and scratch coat. Successive render coats applied over the stipple must become progressively weaker but never weaker than 1:3 and use good quality, well-graded sands.
As noted, the application over timbers would still require securing the riven lath and adding hair into the render. At least 3 or 4 days must be left between undercoats, and they need protection from poor wet weather for a couple of days after application. However, considering that we are now at the start of autumn and you will be working over winter, providing a fully sheeted scaffold is still advisable, as noted earlier.
Once all coats have been applied, they can be left with a self-coloured natural lime finish coat, but if you decide to do this, it is more appropriate that the final float coat is made up of a premixed render of the same brand, ie. Lime Green Duro and Lime Green Natural Finish.
Comments on option 2.
Once fully cured, the resulting render will provide good vapour permeability and flexibility compared with a cement/lime-based render, although slightly less than a feebly hydraulic or lime putty-bound render. The scaffold and protection could be removed two months earlier, and the work speed would be quicker.
Option 3. Re-render using an insulating lime-bound render
All the work required, including applying the stipple coat, would be necessary as described above. Afterwards, the hydraulic lime bound, glass bead insulating render would be built up in layers of up to 20 mm per day and finished after initial curing with a premixed self-coloured hydraulic lime finish coat.
Comments on option 3.
Using Lime Green Ultra or Cornerstone Insulating Render would allow the building to be rendered with a material with very low compressive strength and good vapour permeability, moving the condensation point out of the building and away from the historic timber frame that sits within the brickwork.
Option 4. Re-render using an insulating softwood fibre board and lime-bound render
As described above, all the work required, including applying the stipple coat and one or two coats of insulating render to remove the worst of the unevenness in the walls, would be necessary. Afterwards, an 80-mm insulating softwood fibre board could be applied over the faces of the building and finished with an impact-resisting lime render undercoat and self-coloured top coat.
Comments on option 4.
Technically, this option would be the best for conserving the building's fabric but would require significant enabling works, including extending the modern external window reveal boards and sills, creating new plinth details, and extending the roof overhang.
Conclusion
We are happy to provide a detailed spec for any of the above options as required, although good suppliers in the local neighbourhood, will also offer this service.
Related Articles

Conservation cleaning, metal work and masonry repairs at the cemetery of St John the Divine
M Womersleys have just finished assisting students and tutors with conservation cleaning, metal work…

Guidance Sheet for burning lime, quenching, slaking and using lime for conservation work in Antigua
M Womersleys Ltd assisted the Harrison Centre to allow them to construct an active lime kiln in their…
The steps members of the Waterton’s Wall restoration team, with support from Mark Womersley, have been following to consolidate, conserve and repair this historic wall that represents the successful efforts of Charles Waterton to preserve the wildlife that lived on his estate near Wakefield in West Yorkshire.
1. Fill deep voids behind the wall’s facing stones with deep pointing work. The works involve …